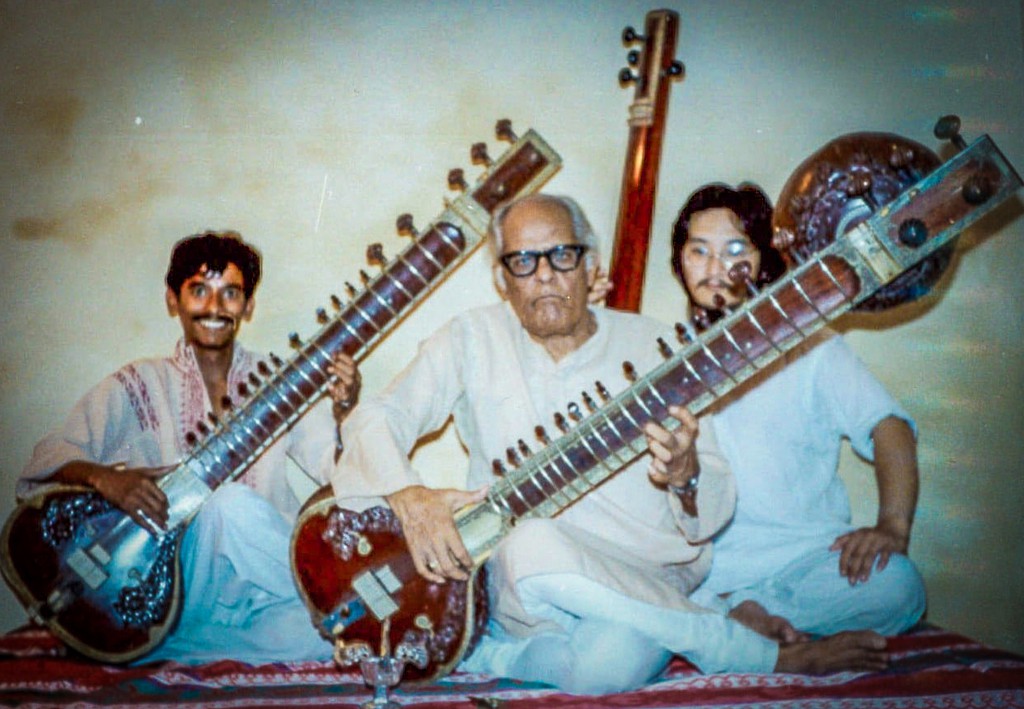
Very similar to this previous “tumba horror” case, I received another one. The tumba has been broken into several bigger parts and then glued together with an unknown compound. I have no idea what happened to this beautiful instrument but it is clear that the defect has not really been properly repaired
People then think that ordinary wood glue is not strong enough and use modern synthetic glues to get things solid again. Unfortunately, this is not really the way to go. It is important that the various pieces are put together properly and as quickly as possible with ordinary white wood glue.
So, in this case it was back on. The whole thing has to be taken apart again, the synthetic stuff removed and the pieces made to fit again.
Since several large surfaces are involved, the job has to be done in several stages.
The tabli was also well loose and was the first part to be separated. Then the larger parts were taken apart. In the end, not really much remained…
A spectacular image, though…
Piece by piece, the tumba regained its original shape. Because the parts no longer fit 100% well, reinforcement was applied along the inside in the form of strips of cotton cloth soaked in white wood glue. Holes were filled with a mixture of wood glue and sawdust.
Then the tabli came back on.
The transitions between the different tumba parts are made smooth with some sanding and plastering with wood glue.
Finally, the whole tumba gets a new coat of colour and lacquer. Ready for a new life…
Tag Archives: SitarRepair
Tumba Horror
A while ago, I received this mail:
Hallo,
I got the chance to buy an old Rikhi Ram GP Sitar for 40€ only (the 60yo sellers dad died and she kept it since~30yrs ago so I would guess 1970s or 80s).
The sitar looks very good and has the white/gold Rikhi Ram label, but the gourd is broken on two positions or more. Some parts of the gourd they kept, some parts are missing. Someone unfortunately already tried to repair it without any success, the repaired pieces look extremely shitty glued 😀
I would like to get the sitar repaired, but I wouldn’t trust me to do it so I thought Ill contact you as I follow your blog enthusiastically for some time now.Can I maybe send you some pictures to get you an impression of the damage? Since the sitar just stood around for 30ish years, I would like to get a full facelift done of everything plus jawari of course.
Sören, from Germany
A while later, the sitar has arrived…
Terrible what happened to this sitar:
It is difficult to find out what product was used. I think it must have been a hard synthetic glue on the inside, and then overlaid by a hard hot glue on the outside.
The good news is that the construction on the inside is well done firmly, so that is a good point. I can remove the hard glue on the outside with a chisel and make it smooth again. The tumba is definitely repairable. It does have a few pieces missing, but I can repair them with pieces from another broken tumba I have lying around here.
Once the tumba is ready, I can remove the remnants of that shitty glue on the outside with sandpaper and smooth the surface. A new black wax bond is also applied.
Followed by a finish with new colour & shellac lacquer layers.
The rest of the sitar looks fine. All the pegs are ok but turn very stiffly, the frets are oxidised but of fine quality, a good bridge in horn is present and intact and the joint is tight.
Finally frets repolishing and binding, new strings, doing jawari and tuning etc…
I think this sitar is definitely worth all the work. It is a common good quality Rikhi Ram Gandhar Pancham 70-80’s model that has potential to be a good sounding & reliable sitar. So be it! 🙂
Rudra Veena repair
This anonymous rudra veena was found by my friend Guillaume CZLT in Bombay Pekin Bruxelles, a shop for second-hand furniture in Brussels. It was quite badly damaged. One of the tumbas was badly broken, the main bridge had been torn off and lost, and all the frets had been worn away. The fretboard looked more like a pattata field. All the frets were loose and crooked on the neck. A cikari pin was broken… and one day there must have been strings on the instrument…?
The work started with repairing the broken tumba. I counted 27 pieces (or small pieces) and 3 appeared to be missing. The puzzle was put back together in 5 stages. Fortunately, everything still fitted well and the transitions are usually smooth. A few coats of varnish over the whole finished this part. Colour matching was not done at this stage.
After that, the frets were taken in hand. The old aluminium strips were easily lifted out of the holder. I ordered a set of 24 new pre-cut pieces of fret wire Wagner 9671 Nickel Silver Frets, Large/Jumbo, with dimensions (W x L x H): 70 x 2,75 x 3,2 mm. But first the fret holders all had to be made equal and properly attached to the central guiding shaft. And this one was crooked and irregular too. With a little trick I could get all the frets nicely in one row and fix them firmly in place. After that, I made the top even and flat and finally installed the new frets. That looks good!
The last part is the new ghodi. A round base that is glued to the neck gets a nice straight surface. On top of that comes a removable ghodi that is firmly held in place by two metal pins. Quite a construction, but in the end it fits nicely on the whole. Because the upper part is removable, you can easily do jawari at any time. Now all that’s left is to put new strings on it…
I think Guillaume will be pleased… 😉
Technical info on strings & tuning according to Asad Ali Khan style:
The scale measures 945cm & the instrument is tuned to G#
Cikari’s: steel 0,30mm (N°3) tuned to G#3 (SA) & G#4 (SA)
Baj tar: steel 0,40mm (N°6) tuned to C#2 (MA)
SA tar: bronze 0,56mm (N°24) tuned to G#2 (SA)
PA tar: bronze 0,72mm (N°22) tuned to D#2 (PA)
Kharaj: flatwound bronze 0,92mm (N°20) tuned to G#1 (SA)
Laraj: bronze 0,56mm (N°24) tuned to G#2 (SA)
For more info about rudra veena you can visit www.rudravina.com and www.rudraveena.org
Kunti Hole Bushing
A sitar tuning peg or “kunti” works on the basis of friction. The peg is conically ground and is clamped into a conical hole. After some time, the surfaces will wear out and the peg will go deeper and deeper into the hole. Eventually it comes out deeper and deeper on the other side.
Usually the sitar pegs are made of a hard wood (ebony or rosewood or sheesham) and thus the hole in the neck, which is made of a softer wood (tun or teak), will wear out.
Time to mount new pegs that are a bit thicker. But actually there is nothing wrong with the original tuning pegs. A solution is to provide the holes with a new layer: the kunti bushing.
For this you can use sandpaper of a good quality. The back side, which is made of strong paper, can serve as a layer of wood while the rough sanding side provides an excellent adhesion inside the hole.
It is a matter of cutting out a well-fitting piece of sandpaper and gluing it properly into the hole. Make sure that the sandpaper fits perfectly and does not overlap. Also make sure that no glue gets between the kunti and the bushing. The glue should only be sitting between the rough sandpaper-side and the hole in the neck.
You can use the peg itself to fit the sandpaper in the hole and as a clamp to keep the sandpaper in place while drying.
When everything is dry, you can cut away the excess piece of sandpaper with a sharp chisel.
In this way, the original pegs can continue to be used.
Keep in mind that this bushing will have to be replaced after a while. The paper will wear out faster than the wood of the neck. It is best to look out for professional quality sandpaper. Then you will be at ease for a long time!
See more at this new Repairs-page: Kunti Bushing
Kunti Bushing
A sitar tuning peg or “kunti” works on the basis of friction. The peg is conically ground and is clamped into a conical hole. After some time, the surfaces will wear out and the peg will go deeper and deeper into the hole. Eventually it comes out deeper and deeper on the other side.
Usually the sitar pegs are made of a hard wood (ebony or rosewood or sheesham) and thus the hole in the neck, which is made of a softer wood (tun or teak), will wear out.
Time to mount new pegs that are a bit thicker. But actually there is nothing wrong with the original tuning pegs. A solution is to provide the holes with a new layer: the kunti bushing.
For this you can use sandpaper of a good professional quality. The back side, which is made of strong paper, can serve as a layer of wood while the rough sanding side provides an excellent adhesion inside the hole.
It is a matter of cutting out a well-fitting piece of sandpaper and gluing it properly into the hole. Make sure that the sandpaper fits perfectly and does not overlap. Also make sure that no glue gets between the kunti and the bushing. The glue should only be sitting between the rough sandpaper-side and the hole in the neck.
You can use the peg itself to fit the sandpaper in the hole and as a clamp to keep the sandpaper in place while drying.
When everything is dry, you can cut away the excess piece of sandpaper with a sharp chisel.
In this way, the original pegs can continue to be used. Keep in mind that this bushing will have to be replaced after a while. The paper will wear out faster than the wood of the neck. It is best to look out for professional quality sandpaper. Then you will be at ease for a long time!
Makhan Lal Roy sitar surbahar repair
Here is an old and worn Makhan Lal Roy & Son sitar with numerous defects coming to my shop. It is a very rare surbahar style sitar with very little decoration. I have no idea about the age of this sober beauty but she has clearly been through a lot.
View the main list of defects:
-
- Neck plate is loose
- Joint is loose
- Pardas are worn
- Pegs are worn & greasy
- Tarav holes are broken
- Tarav mount on tabli is broken
- Lacquer on tumba is damaged
Additionally there are a few small things to do and finally new strings to be mounted & jawari done…
Unfortunately the owner decided not to have repaired everything at once. The cost is too high. The original tarav strings mount remains broken and the strings itself are attached to the main string mount as done on ordinary sitars, across the tabli. The lacquer has been cleaned thoroughly but remains as is. So I expect this sitar back sooner or later… but for now she is ready to be played on again.
Benares tanpura repair
One day I received a quite damaged and almost demolished tanpura. “Children have been playing with it…” was the comment of the owner. I wonder what game they have been playing, but it was certainly not a peaceful game. Or, at least at some time it went out of hands… as one can say?
The tanpura seems to be an old instrument, bought in Benares in the 70’s. It shows already some diligent life-signs, sensations and similar repairs. As such the gourd looks impressive. I will aim to maintain this mood. Just regain its spirit. That’s where it’s ever made for…
I started to remove every worn leftover hardware piece and glued all the cracks in the wooden body. There were many! And, even the tabli has completely come loose.
I restored some deco’s and took advantage of the situation to create some extra goodie carved into the celluloïd: an OM sign, in the middle of a simple repetitive circular design …
After that, some body cleaning and leveling has been performed followed by rough color matching. Mahogany as well as gulanagari red have been applied before, so I used it again now. Followed by a thin and fresh new protective shellac finish layer, treated with bee wax to regain it’s aged expression.
Doing jawari & mounting new strings to conclude…
Note: this is a large female size (35inch) tanpura.
Sound sample: Benares tanpura
The scale (open string length) of this slim instrument is 90cms and it is tuned to F#.
The string set is
1: 0,41mm bronze string tuned to C#3
2: 0,30mm steel string tuned to F#3
3: 0,30mm steel string tuned to F#3
4: 0,56mm bronze string tuned to F#2
Drowned Sitar
More than one year ago, an awfull sitar was brought to me. At first sight it looked like it was burnt, but actually it was only drowned for some time. This sitar was stored in a basement which has been filled with water due to an inundation. Only after some time it has been rescued and luckily it was protected by a good fiber case. All the strings and hardware got ruined. The damage to the tumba was horrible but the neck seemed to have endured the misadventure well.
I removed all the hardware and pegs and started to let the sitar rest and dry up completely for almost one year. Then, after some time, the tumba’s lacquer finish started to peel off. So, I removed everything which was hanging some loose and made a new build-up. Fortunately it was a decent tumba, sturdy and round. Then colouring and a fresh full-scale shellac finish finally made it look like a new… real good Srishti Musical sitar.
Vicitra Veena massacre
… without words …
Technical info on strings & tuning:
Baj tar: steel 0,37mm (N°5) tuned to F#2 (MA)
Sa tar: bronze 0,46mm (N°26) tuned to C#2 (SA)
PA tar: bronze 0,56mm (N°24) tuned to G#2 (PA)
Laraj: bronze 0,72mm (N°22) tuned to C#1 (SA)
Kharaj: flatwound bronze 0,92mm (N°20) tuned to G#1 (SA)
Cikari’s: steel 0,30mm (N°3) & 0.28 (N°2) tuned to C#3 (SA) & C#4 (SA)
Tarav’s: steel 0,28mm (N°2)
Tumba cosmetics repair
It began with an ordinary crack. Yet another case of overzealous luggage handling at airports. Very regrettable, but in this case it revealed an underlying and overwhelming problem.
A tumba is made out of a gourd, which is a natural product. As it grows on the field, the shape becomes more or less irregular, as squiggly as nature can be. But in a musical instruments setting this isn’t always very usable or good-looking…
Thus here and there some cosmetics are necessary to give it a more practical, handsome round shape. To obtain this, in general, plaster is applied. But sometimes regular plastering isn’t adequate. When more than a couple of millimeters difference in levelling needs to be adjusted a heavier and stronger filler is needed. Then sawdust, wooden dust, water and woodglue are well mixed and applied prior to the plaster mixture.
On this sitar it seems that the mixture has been made with a persistent shortage of glue. And, secondly, really a massive amount of this poorly mixed material has been used. The obvious reason for this is that the original tumba was of a critical quality. Now it is clear that it is just too thin and weak. At several places the tumba is hardly 2mm thick.
Thus, when repairing the crack, more and more chunks of almost already pulverised wooden dust filler simply fell off from the tumba. Finally, almost the complete surface seems to be covered and more than 50% became loose.
In order to obtain a better bonding the plaster is mixed with woodglue as well. A lot of work…, a lot of drying time needed…, sanding, filling, drying, sanding, filling, drying, sanding…, fine sanding, sealing, colouring and finally the finishing touch with shellac.
Read more about tumba repair : click here