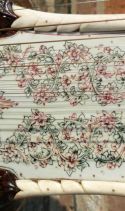
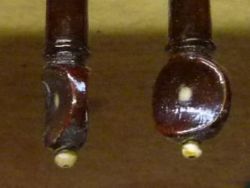
before and during restoration, a few “inside” views…:
Category Archives: repair
Easy loose joint repair
This unknown sitar suffers from a loose joint. The playing string came to almost 18 mm above the last parda. In normal conditions this distance should count only 8 – 11 mm.
The reason why the joint became loose is not determined, but most probably “a small accident” during transport has occured the owner said. Anyway, there is a noticeable crack in the joint…
Since this sitar suffers from more than this (cheap wood quality, a bended neck, and also a deformed tabli is there) and the budget is very limited, I agreed to give it a rather easy and cheap repair: cyano-acrylate glue, penetrated into the loose joint parts, reinforced with a metal locker plate. I saw this before on other “fast & easy repaired sitars” in India. Although it doesn’t look good, it worked out to be very efficient.
In other conditions, the better way of repairing this is described in the Repair section.
Kartar Chand sitar restoration
This early 70’s original Kartar Chand sitar just left the restoration booth. Complete body check-up and new polish has been done by late Kartar’s brother Hari Chand in New Delhi in march 2009 while I was there on a visit. The celluloid mother of pearl imitation parda lanes have been renewed. My part of the job was to refurbish the original pardas and fit them again on the new lanes. I also made and fit new stagghorn jiwaris for main strings and taravs. The original tuning pegs were used again but some taravkuti-holes needed a new bushing.
Note the very fine finger grips on these taravkutis and also the remarkable cherry-round tumba-shape which is very typical on all Kartar Chand’s sitars.
This sitar sounds amazingly bright and has a vivid tarav response. The meends play very easy and the instrument is very light-weighted.
New pardas on Hiren Roy
This old Hiren Roy sitar, brought to me by Arnoud E. needs new pardas and some small repair work. Arnoud provided a full set of new pardas made by Hiren Roy Company, but some of them were made too short. Thus I decided to reuse a selection of the old pardas and fitted them at the end (the last 4, nearest to jiwari).
Also some body cleaning has been performed and together with new strings and fresh jiwari this sitar is ready for another life… finally almost a complete restoration.
Tanpura damage
This small instrumental tanpura has been damaged during transport from Calcutta to Belgium. Frederic tS. has bought it new at Hiren Roy and shipped it by air with Jet Airways. The parcel arrived in Belgium with a slight crack in the fiber case and the instrument itself was pretty damaged. The tabli and a small piece of the neck became loose over 70% of its contour. At the time of departure it was very hot in Calcutta, Frederic said but a newly made instrument from this famous instrument makers branch should be resistant to regular climatical circumstances as they occur very common in that region.
For me and you a unique occasion to discover the interior of such an instrument. The tabli is thin, measuring from 5 to 9mm, out to in and roughly cut with a round chisel. Also the back piece is cut very roughly and irregularly and is rather thin. At the tail a piece of bamboo is mounted and bamboo nails are used to fix the decoration again after the repair.
Just some pictures… (click to zoom)
Neck bend repair
This sitar which belongs to my friend Chico has a problem: the neck has bended too much. The playing string is tilted 14mm above the last pardas’ surface. The neck came up 5mm at the tar daan position. See the photo (left) with the red line. (click on the photo to enlarge)
To fix this problem, the sitars neck has to be opened and glued again. The result is yet to be seen on the photo (right) with the green line. (click on the photo to enlarge)
You can see more photos about this surgery on a new page added to the repairs chapter.
Joint Repair II end.
Finaly, at the end of july we were lucky to have had at least a couple of days good weather with nice sunshine. One of these days I succeeded to finish the polishing of this sitar. I’ ve been making some fresh new polish ready during a previous (short) visit of our much beloved sun at the end of june…
A couple of days later the polish has been drying sufficiently. Time to complete the sitar again by mounting the pardas, jiwaris and strings.
Joint Repair II cont”d
The joint has been fitted and glued again. On the left hand side you can see some adjustment strips sitting between the joint and the body.
Then the tabli is glued to the body. A rope is used to keep the tabli fixed and under sufficient pressure at regular points along its contour.
Now this sitar body is ready to get some new polish. But unfortunately we have to wait for the good weather to come…
Joint Repair II cont’d
… after some time the glue became softened and the joint can be removed.
Now, the wooden parts need some time to dry thoroughly.
Joint Repair II
This old Rikhi Ram is having a problem: the joint got loose.
I handled the same problem before on another (left – handed) RR sitar. On that occasion I made a new joint which took a lot of work to make it fit perfectly. Now I turned an old pressure cooker into a steam generator which is used for removing and loosening the animal glue.
First step is to open the sitar :
Then I drilled a fine hole in the corner area of the joint in which the needles will blast their steam.
I add water to the pressure cooker and have the power switched on …